| Time: | 2 days |
| Distance: | 30 km |
| Fitness: | MH |
| Skill: | M |
| Ascent: | 850 m |
| Maps: | LPI Kanangra 8930-3S 1:25000 |
| LPI Yerranderie 8929-4N 1:25000 | |
| Notes: | Print-friendly notes (opens in new window) |
Introduction
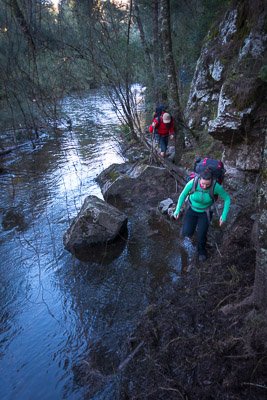
Crossing a higher than usual Kowmung River
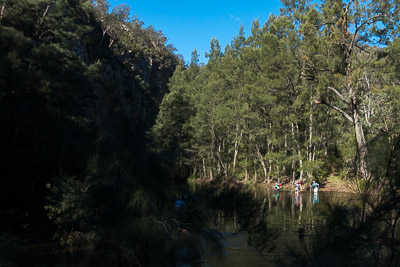
The Kowmung River is the major tributary of the Coxs River, flowing through remote country south of Kanangra Walls. This walk visits a part of the Lower Kowmung, the section of river downstream from Bulga Denis Canyon, where it opens out and flows through a wider gorge. There are flat grassy banks in plaes, though occasional bluffs descend right down to the river.
The route is a moderately tough one, with much of the distance on either rough tracks or no track, particularly along the river. The navigation is not too hard, but parties should have a competent navigator.
If the river is up, it may be dangerous to cross. In this case, it is best to camp at Orange Bluff, and return the same way the following day.
The big climb out means that summer is probably not the best time for the walk, though the river is good for swimming. Autumn and spring are a bit cooler, and autumn in particular means the river will still be a warm enough for a dip. Winter is good for the hills, but the river crossings are icy cold.
Access
The walk starts at Kanangra Walls car park. For directions on how to get to Kanangra Walls, see the information on the Kanangra Walls region to the right.
Track notes
From 31 Jul 2016, last checked 31 Jul 2016
Day 1: Kanangra Walls to Rainbow Bluff (14km, 850m descent, 6-7 hours)
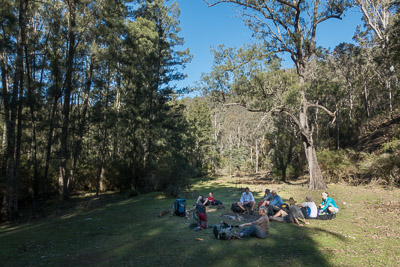
Grassy flats at Rainbow Bluff
From the car park at Kanangra Walls, head out towards the lookouts, and turn right, following signs to the Plateau Track. In the saddle, avoid a turn off to the right to Dance Floor Cave and ascend a set of steps on to the plateau proper.
The track out along the plateau crosses a number of rocky clearings, but is fairly wide, obvious and well-maintained. However, you should be heading in a generally easterly direction. There are numerous places to detour off the track to the cliff edge to the north for fantastic views of the Kanangra Creek gorge, Thurat Spires, and Kanangra Falls.
At a large rocky clearing (GR 341357) about 1km on to the tops, the trail divides. Take the branch of the track that heads initially east, and then south towards Maxwell Top Avoid a turn off to the left after another kilometre, and continue along the eroded track which drops into a saddle and then climbs to Murrarang Top. Down the other side, keep left at a fork, and shortly descend through a break in the cliff line, with a small scramble.
Make a note of the descent spot for the return trip.
Turn left and continue along to shortly reach the Coal Seam Cave. This is a large overhang which is often used by parties on the Friday night of a weekend walk. At the end of the cave, the track drops steeply down to a saddle, where it forks. The right fork leads up to Cottage Rock, which is a worthwhile detour. Otherwise take the left fork, which contours below Cottage Rock.
Walking on grassy flats near Roots Ridge
A further 500m on, just after a saddle, keep left again - the right fork (faint) leads out towards Bullhead Mountain. Descend into a saddle for about 1km and then climb steeply up to First Top Mountain.
The main track keeps to the north side of First Top Mountain. Near the top, pick up a faint track off to the right (SE) that leads over First Top Mountain, and down Brumby Ridge. Keep an eye on the map as you descend. The track largely follows the main ridge, ending up at the bottom opposite Orange Bluff. This ridge heads south for about 1.5km, then SE for around 1.5km, and finally east down to the river. There are a few opportunities to wander off on to minor ridges so some navigation may be required, as the track in places is indistinct. In particular, the track may disappear altogether for the last few hundred metres to the river, as the ridge flattens out and the ridgeline becomes hard to pick.
At Orange Bluff, cross over to the other side of the river. The river typically ranges in depth from less than knee deep to swimming, depending on the crossing point and recent rain. If you can't find a crossing point less than waist deep, then the river is probably up, and you should consider a change of plans. Generally speaking, the best crossing points are just upstream from a rapid, where the river gets shallow.
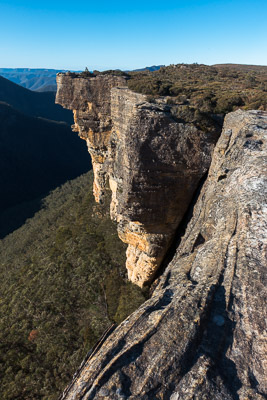
Riverside bluffs
Head downstream for 2.5km. The walking is a mix of grassy sections with some scrub, rock slabs, and some bits along steep slopes. There is no track, and it is best not to climb too high above the river. If the river is low, there is the option of multiple crossings to keep to the inside bank around the bends.
The campsite is a large clearing at GR 395322 (Rainbow Bluff). If you are prepared to push on for another hour or so (2.5km), there are some other options for camping opposite Hughes Ridge, at GR 410337, and GR 416342 (Ferny Flat). This will make the second day shorter.
Day 2: Rainbow Bluff to Kanangra Walls (16km, 850m ascent, 6-8 hours)
An early start is needed to finish the river section. It is not too hard to continue on the same (southern) bank to near the foot of Hughes Ridge. Cross back to the north side near the foot of Hughes Ridge.
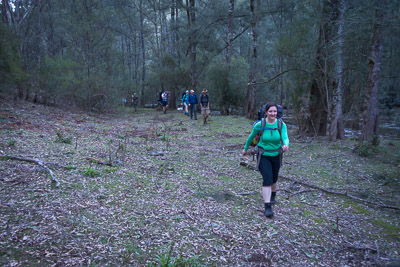
Hughes Ridge is a typical Kowmung ridge, with a steep and occasionally scrubby bottom section up to Mt Hughes, followed by flatter open woodland higher up. There are signs of a track in places on the ridge, but it tends to come and go, and in general the walking is fairly easy.
Depending on your pace, it is about 2-3 hours to the Gingra Range. Keep a close eye on the map as the junction is indistinct. Climb up to the fairly unimpressive Second Top, and over a larger unnamed knoll up to First Top Mountain. The track in this section is likely to be faint.
From here, retrace your steps from the first day back to Kanangra Walls.
Kanangra Walls view
Walk variations
Brumby and Roots Ridges
Time: 2 days Distance: 26 km Fitness: M Skill: M Ascent: 850 m
If you want a shorter two day walk, you can walk in the same way (via Brumby Ridge), and camp at either Rainbow Bluff or Orange Bluff. Exit via Roots Ridge on the second day.
To get on to Roots Ridge from Rainbow Bluff, cross the Kowmung about 300m downstream from the campsite, near the minor creek junction. Roots Ridge narrows relatively quickly, and you will probably find signs of a faint footpad. It is around 4-6 hours back to the car park from Rainbow Bluff.
Related walks
Bulga Denis Canyon
Time: 3 days Distance: 27 km Fitness: M Skill: MH Ascent: 870 m
An excellent walk showing off the great variety of scenery in Kanangra-Boyd NP.
Orange Bluff
Time: 2 days Distance: 22 km Fitness: EM Skill: EM Ascent: 850 m
The shortest walk from Kanangra Walls to the scenic Kowmung River, with an excellent campsite below the towering Orange Bluff
Kanangra to Carlon's Farm (Green Gully)
Time: 3 days Distance: 36 km Fitness: M Skill: M Ascent: 1380 m
A variant on one of the classic Blue Mountains walks - finishing at Carlon's Farm below Blackheath, rather than at Katoomba
Kanangra to Katoomba
Time: 3 days Distance: 45 km Fitness: MH Skill: M Ascent: 1350 m
An excellent crossing of the southern Blue Mountains with a variety of scenery
Cottage Rock
Time: 4 hrs Distance: 9 km Fitness: E Skill: EM Ascent: 160 m
A relatively easy day walk with excellent views at a number of points along the way.
Personal reports
30-31/07/2016 - Kowmung River: Kanangra Walls - Coal Seam Cave - Cottage Rock - Gingra Range - First Top - Brumby Ridge - Orange Bluff - Kowmung River - Rainbow Bluff - (near) Ferny Flat (C) - Kowmung River - Hughes Ridge - Second Top - Gingra Range - Coal Seam Cave - Kanangra Walls [SBW][L] (report | photos)