| Time: | 3 days |
| Distance: | 36 km |
| Fitness: | M |
| Skill: | M |
| Ascent: | 1380 m |
| Maps: | LPI Jenolan 8930-3N 1:25000 |
| LPI Kanangra 8930-3S 1:25000 | |
| Myles Dunphy Gangerang and Wild Dog Mountains Sketch Map 1:31680 | |
| Sketch maps: | Sketch map 1 PDF |
| Sketch map 2 PDF | |
| Sketch map 3 PDF | |
| Sketch map 4 PDF | |
| Notes: | Print-friendly notes (opens in new window) |
Introduction

Aren't BASE jumpers supposed to use parachutes, not rucksacks?
The walk from Kanangra Walls to Katoomba is one of the classic longer walks of the Southern Blue Mountains, along with the Six Foot Track and Mittagong to Katoomba. This variant finishes at Carlon's Farm, below Blackheath, removing the need for the long fire trail bash along Narrow Neck at the end of the walk. It also allows for a shorter day on the third day, which can be useful if you still have a long car shuffle ahead of you.
While the walk is commonly done over three days, it can be done in two days by fit parties overnighting somewhere around the Coxs River. There are numerous routes that can be taken, and these notes only point out the most commonly taken route. Some suggestions for alternatives are given.
There are plenty of good campsites along the way. The ones at Dex Creek and Mobbs Swamp usually have water available, which is why they are popular. However, they can be crowded at times. Most saddles between Mt Berry and Mt Strongleg offer a flat grassy area. Konangaroo Clearing is a large grassy area next to Kanangra Creek, and would be an excellent campsite if doing the walk in two days. Likewise there are numerous flat grassy areas between Mt Yellow Dog and Medlow Gap.
Access
Kanangra to Carlons Farm requires a long car shuffle.
To leave a car at Carlon's Farm (Green Gully), drive to Blackheath, and take the left turn (coming from Katoomba) across the railway line at the traffic lights in town. Turn left again immediately, and then take the first right. After about 700m take a left turn, following the sign to Megalong Valley. The road is windy for the next few kilometres. About 13km after the turnoff you cross Megalong Creek at the Old Ford Reserve bridge. Continue along the (now unsealed) road for about 7km, through a couple of gates to reach the old farmhouse of Green Gully. Cross the bridge and head up the hill on the other side. At the T-junction at the top, turn left, and the parking area is at the top of the next hill.

A couple of attractive looking specimens, with Kanangra Walls in the background
The other car you will need to get to Kanangra Walls. For details on how to get to Kanangra Walls, see the information in the Kanangra Walls region, to the right.
If you have a large group you may be able to avoid the car shuffle by splitting in two, and doing the walk in opposite directions. However, you will need to make sure you can meet in the middle to exchange keys.
Track notes
From 12 Jun 1999, last checked 09 Nov 2004
Day 1: Kanangra Walls to Mt Cloudmaker to Dex Creek (13km, 400m ascent)
From the car park at Kanangra Walls, follow signs to the Plateau Track. Avoid a turn off to the right to Dance Floor Cave and ascend a short climb on to the plateau proper.
The track out along the plateau crosses a number of rocky clearings, but is fairly wide, obvious and well-maintained. At a large clearing about 1km on to the tops, the trail divides, and becomes narrower. From the east side of the clearing, with one branch heads initially east, and then south towards Maxwell Top, while the other heads north east from the northern side of the clearing. Take the north east branch, which keeps close to the northern edge of the tops. The views in this section are excellent, with the spectacular Kanangra Falls and Kalang Falls in full glory after rain, and the magnificent Thurat Spires glowing red in the morning light.

Looking back up at the Walls from the Kilpatrick Causeway
Near the end of the plateau, the track heads down and into a small gully. A short steep scramble is needed down the gully, and follow the track around and up on to Kilpatrick Causeway. After a further kilometre, the track climbs briefly to the bottom of Crafts Wall, and traverses along steep slopes along its north west side. Reaching the corner of the Wall, take the track to the north west, which heads down a hill, and then up to the conglomerate bluff at the southern end of Mt Berry. Keep to the right of the cliff until you can walk up a gully on to the tops. The cliffs on the west side of Mt Berry have superb views of Crafts Wall and Kanangra Walls.
The descent to Gabes Gap, the low point of the day, follows. The steepest ascent of the day is from here, up to Mt High and Mighty. The views from the top are good and it is not a bad spot for lunch.
After a break, continue on to Mt Stormbreaker. Then there is the final up and down (but more up than down) around Rip, over Rack, around Roar and over Rumble, before you reach Mt Cloudmaker. The top of Mt Cloudmaker is covered with trees and there are no views. There is a log book on top of the summit cairn that you can sign.
From Mt Cloudmaker, head NE on a vague track that traverses the northern flank of the summit ridge to its eastern end, before dropping off to the north down to Dex Creek at MGA401416. Note there is another track from the top of Mt Cloudmaker that heads generally south east, and then east on to the Ti Willa Tops, so don't just assume any track is the right one. Dex Creek usually has flowing water, but it can dry up after longer dry spells. There are a number of small campsites on both sides of the creek.
Day 2: Dex Creek to Mt Strongleg to Mobbs Swamp (16km, 650m ascent)
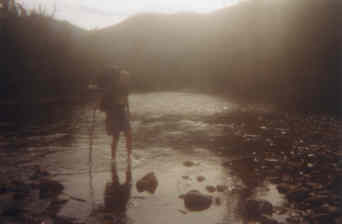
Crossing the Cox's River in the middle of June is not so warm!
The next morning, get an early start and navigate carefully on to the ridge leading from Carra Top to Mt Moorilla Maloo. There are a confusion of competing tracks heading up from Dex Creek. The ridge drops off steeply to the west, so it is usually easiest to keep to the west side. The scrub that used to be a fight to get through has been somewhat tamed by the sheer number of walkers.
Once on the ridge, head on the track to Mt Moorilla Maloo. The track heads WNW and then north to Mt Amarina, but it is worth climbing Mt Moorilla Maloo if you have time. From Mt Amarina it is easy walking over Kullieatha Peak, down into the saddle and around the east side of Mt Strongleg.
The trail heads steeply north down the obvious ridge, finishing at Kanangra Creek where you can fill up with water. It starts to braid in places and becomes easier to lose, but it is not critical where you end up at the bottom. If you have sufficient water, you can take a short cut about half way down aiming for the bottom of Yellow Pup Ridge. This bit of the ridge is open but steep apart from the last 50m or so to the Coxs River. The Coxs River is generally easy to ford just before a small set of rapids on the west side of Yellow Pup Ridge. The river should only be about knee deep at this point. If it is more than waist deep then it is dangerous to cross, and you may need to wait until the level drops, or possibly even return to Kanangra Walls.
The next section is the longest climb on the walk. Head around to the bottom of Yellow Pup Ridge and up the track. There is a steep eroded section about half way up, after which the track goes into a series of switchbacks. One last steeper section gets you to the top.
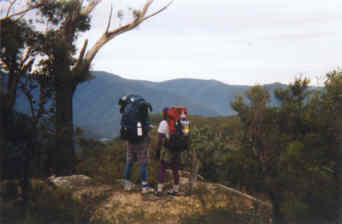
The view from Mt Moorilla Maloo
From here to Mobbs Soak is fairly flat, with less than 30m of elevation change. The track starts by following the east side of Yellow Dog Ridge to the flats below Mt Dingo. At Mt Dingo, a well defined track branches off to the right up to the summit, and you can visit the lookout at Splendour Rock if you have the time. A high traverse via Mt Merrimerrigal, Mt Warrigal and Mt Mouin is an alternative route to Medlow Gap, but requires that you have sufficient water.
Otherwise, continue along the track for a further 2km to Mobbs Swamp, a convenient campsite for the night. Mobbs Swamp is on the south side of Warrigal Gully, at the head of the creek, and is reached after a steady downhill on the track. Water can usually be found in the creek below the campsite, or a little further along where the creek crosses the main track. There is a large but gloomy camp cave just above the creek below the campsite.
Day 3: Mobbs Swamp to Black Horse Ridge to Carlons Farm (7km, 330m ascent)
From Mobbs Swamp, head north on the track, which swings around to the east as you pass Blue Dog Ridge. After contouring around the head of a small gully, it climbs over Black Horse Ridge. At a clearing on top of the ridge, there is a 5 way intersection. Take either of the two tracks to the left (north), as they rejoin after about 150m. After about 2km, the ridge drops off on a steep winding descent of 400m to Breakfast Creek. Pick up the track that runs along Breakfast Creek, and head right (east) on it. It quickly crosses Breakfast Creek, and heads up the west side of Carlon Creek.
Carlon Creek is famed for its stinging nettles, so long pants are a good idea for this section. The track criss-crosses Carlon Creek all the way to the top, where it climbs out up a steep overgrown fire trail. At the top of the fire trail, turn left at a T-intersection and follow this back to a stile. Climb over the stile, turn right, and walk up the hill to the Dunphy Camping Area, where you should have a car.
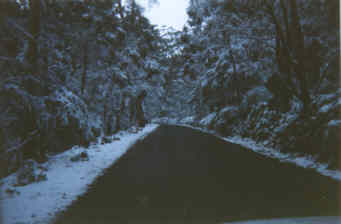
Winter wonderland on the road to Jenolan
Related walks
Cottage Rock
Time: 4 hrs Distance: 9 km Fitness: E Skill: EM Ascent: 160 m
A relatively easy day walk with excellent views at a number of points along the way.
Bulga Denis Canyon
Time: 3 days Distance: 27 km Fitness: M Skill: MH Ascent: 870 m
An excellent walk showing off the great variety of scenery in Kanangra-Boyd NP.
Breakfast Creek and Ironmonger Hill
Time: 5 hrs Distance: 13 km Fitness: M Skill: M Ascent: 600 m
A good introduction to the Wild Dog Mountains. Some creek hopping and ridge walking add variety to some spectacular scenery.
Tarros Ladder and Carlon Head
Time: 5 hrs Distance: 16 km Fitness: M Skill: H Ascent: 500 m
A challenging walk visiting two of the climbing passes of Narrow Neck
Gingra Range
Time: 2 days Distance: 36 km Fitness: MH Skill: EM Ascent: 890 m
A long but fairly straightforward walk out to the junction of the wild Kowmung River with Gingra Creek
Dunphys Pass and Harmil Ledge
Time: 6 hrs Distance: 10 km Fitness: EM Skill: MH Ascent: 490 m
An excellent walk along two of the shale ledge passes of Narrow Neck, with great views on a clear day
Splendour Rock
Time: 2 days Distance: 24 km Fitness: EM Skill: M Ascent: 640 m
A walk with lots of variety, visiting a famous lookout and home of the Bushwalkers War Memorial
Knights Deck
Time: 8 hrs Distance: 16 km Fitness: MH Skill: M Ascent: 1080 m
An excellent walk visiting two spectacular lookouts in the Wild Dog Mountains
Hatchers Hollow
Time: 2 days Distance: 24 km Fitness: MH Skill: MH Ascent: 840 m
A challenging walk to this excellent campsite on the picturesque Kowmung River
Orange Bluff
Time: 2 days Distance: 22 km Fitness: EM Skill: EM Ascent: 850 m
The shortest walk from Kanangra Walls to the scenic Kowmung River, with an excellent campsite below the towering Orange Bluff
Brumby and Hughes Ridges
Time: 2 days Distance: 30 km Fitness: MH Skill: M Ascent: 850 m
A harder walk in the upper reaches of the beautiful lower Kowmung River.
Kanangra to Katoomba
Time: 3 days Distance: 45 km Fitness: MH Skill: M Ascent: 1350 m
An excellent crossing of the southern Blue Mountains with a variety of scenery
Mt Mouin
Time: 6 hrs Distance: 15 km Fitness: M Skill: EM Ascent: 640 m
A solid walk to one of the highest of the peaks in the Wild Dogs, with great views
Lower Jenolan River
Time: 2 days Distance: 23 km Fitness: EM Skill: EM Ascent: 430 m
A good overnight walk exploring some of the ridges and valleys of the Wild Dogs
Personal reports
12-14/06/1999 - Kanangra Walls to Carlons Farm: Kanangra Walls - Mt Cloudmaker - (C) Dex's Creek - Moorilla Maloo - Mt Strongleg - Cox's River - Yellow Pup Ridge - (C) Mobbs Swamp - Black Horse Ridge - Carlons Farm (report | photos)
Links
 Kanangra to Katoomba - David Thurstun (SUBW)
A brief tongue-in-cheek report of a longer Kanangra to Katoomba trip
Kanangra to Katoomba - Shoalhaven Bushwalkers
A mostly pictorial account of a Kanangra to Katoomba trip